


How To Take Better iPhone Photos
Ask and you shall receive! So many of you have been asking for help with how to take better iPhone (or Android) photos so I figured the first thing I’d do is create a blog to help you guys out!
Did you know that professional DSLR cameras run roughly about $2k-$5k and most photographers have 2 camera bodies? Did you also know that on “average” these cameras last about 3-5 years with “normal” use? That being the case, you better believe I fully take advantage of the camera on my iPhone, which honestly, is pretty damn good, and definitely does the job.
I personally have the iPhone 11 because it does have the best camera and because… I like having new electronics haha. Either way, our phones have decent to great cameras on them, depending of course how old they are. The cameras are definitely good enough for taking some rad phone photos that you can make quick edits on and use for social media.
So, because this is all in writing, I’m just going to give a handful of basic tips on how to take better iPhone photos. While I can tell you some mechanics of making a good photo, it also of course depends on your eye and level of creativity… Which is something I personally am always practicing on improving.
10 TIPS ON HOW TO TAKE BETTER IPHONE PHOTOS
- Make sure the subject is obvious, and that you place the subject in a spot where the eye will be drawn to it first, instead of having to search all over the photo for it.
- Tap the screen where you want to focus on.
- Take a few images, from different angles, both horizontal and vertical.
- Focus on making the photo straight when you take the image, so you’ll have less to do in post. (Post=Editing)
- Wait until there’s no body in the background. EX: If you’re taking a photo of your dog on the beach, place your dog in a way where you can take the pic without a person walking by in the background. It’s possible. I promise. Distracting stuff in the background will just ruin any good picture.
- Try not to place peoples heads directly in the horizon, so there’s not a line going through their head.
- STRAIGHTEN YOUR HORIZON LINES PEOPLE. Seriously. A lot of people don’t even notice this, “professional” photographers included. If you take a photo of the ocean, the horizon needs to be straight. Period. Straighten based off of the longest/most prominent line. If you look at the last two examples at the bottom of this blog, you’ll see two photos of the interior of my apartment. In the first one, the prominent line is the edge of the wall. That line needs to be straight, the rest of the lines can be crooked. In the second photo, the important line is the horizontal line atop the shelf. I like to put the longest/most prominent line as the one that will be straightened, whether it be vertical or horizontal. (*Note: The two images I’m referring to are actually screen shots of my camera being open on instagram stories, I never took the photo, just a screen shot to show you guys the difference. So, they’re not TOTALLY straight, lol. I’m weird about straight lines.)
- Shooting into the sun (with the sun behind the subject) is always a bit more challenging, and lots of the time will result in the subjects face(s) being darker than you might like. I’m not going to go super into lighting in this post because it’s more intricate than I’m able to explain in text.
- If you want to take a nice photo of yourself inside, go near a window, and face the window. If you want to take a nice photo outside, look for some open shade. EX: Tree coverage, building coverage, etc. Shade is literally the best place to shoot photos unless you know how to work with light.
- Only use your flash if it’s dark. Natural light is the best light.
5 TIPS ON HOW TO EDIT PHOTOS ON YOUR PHONE
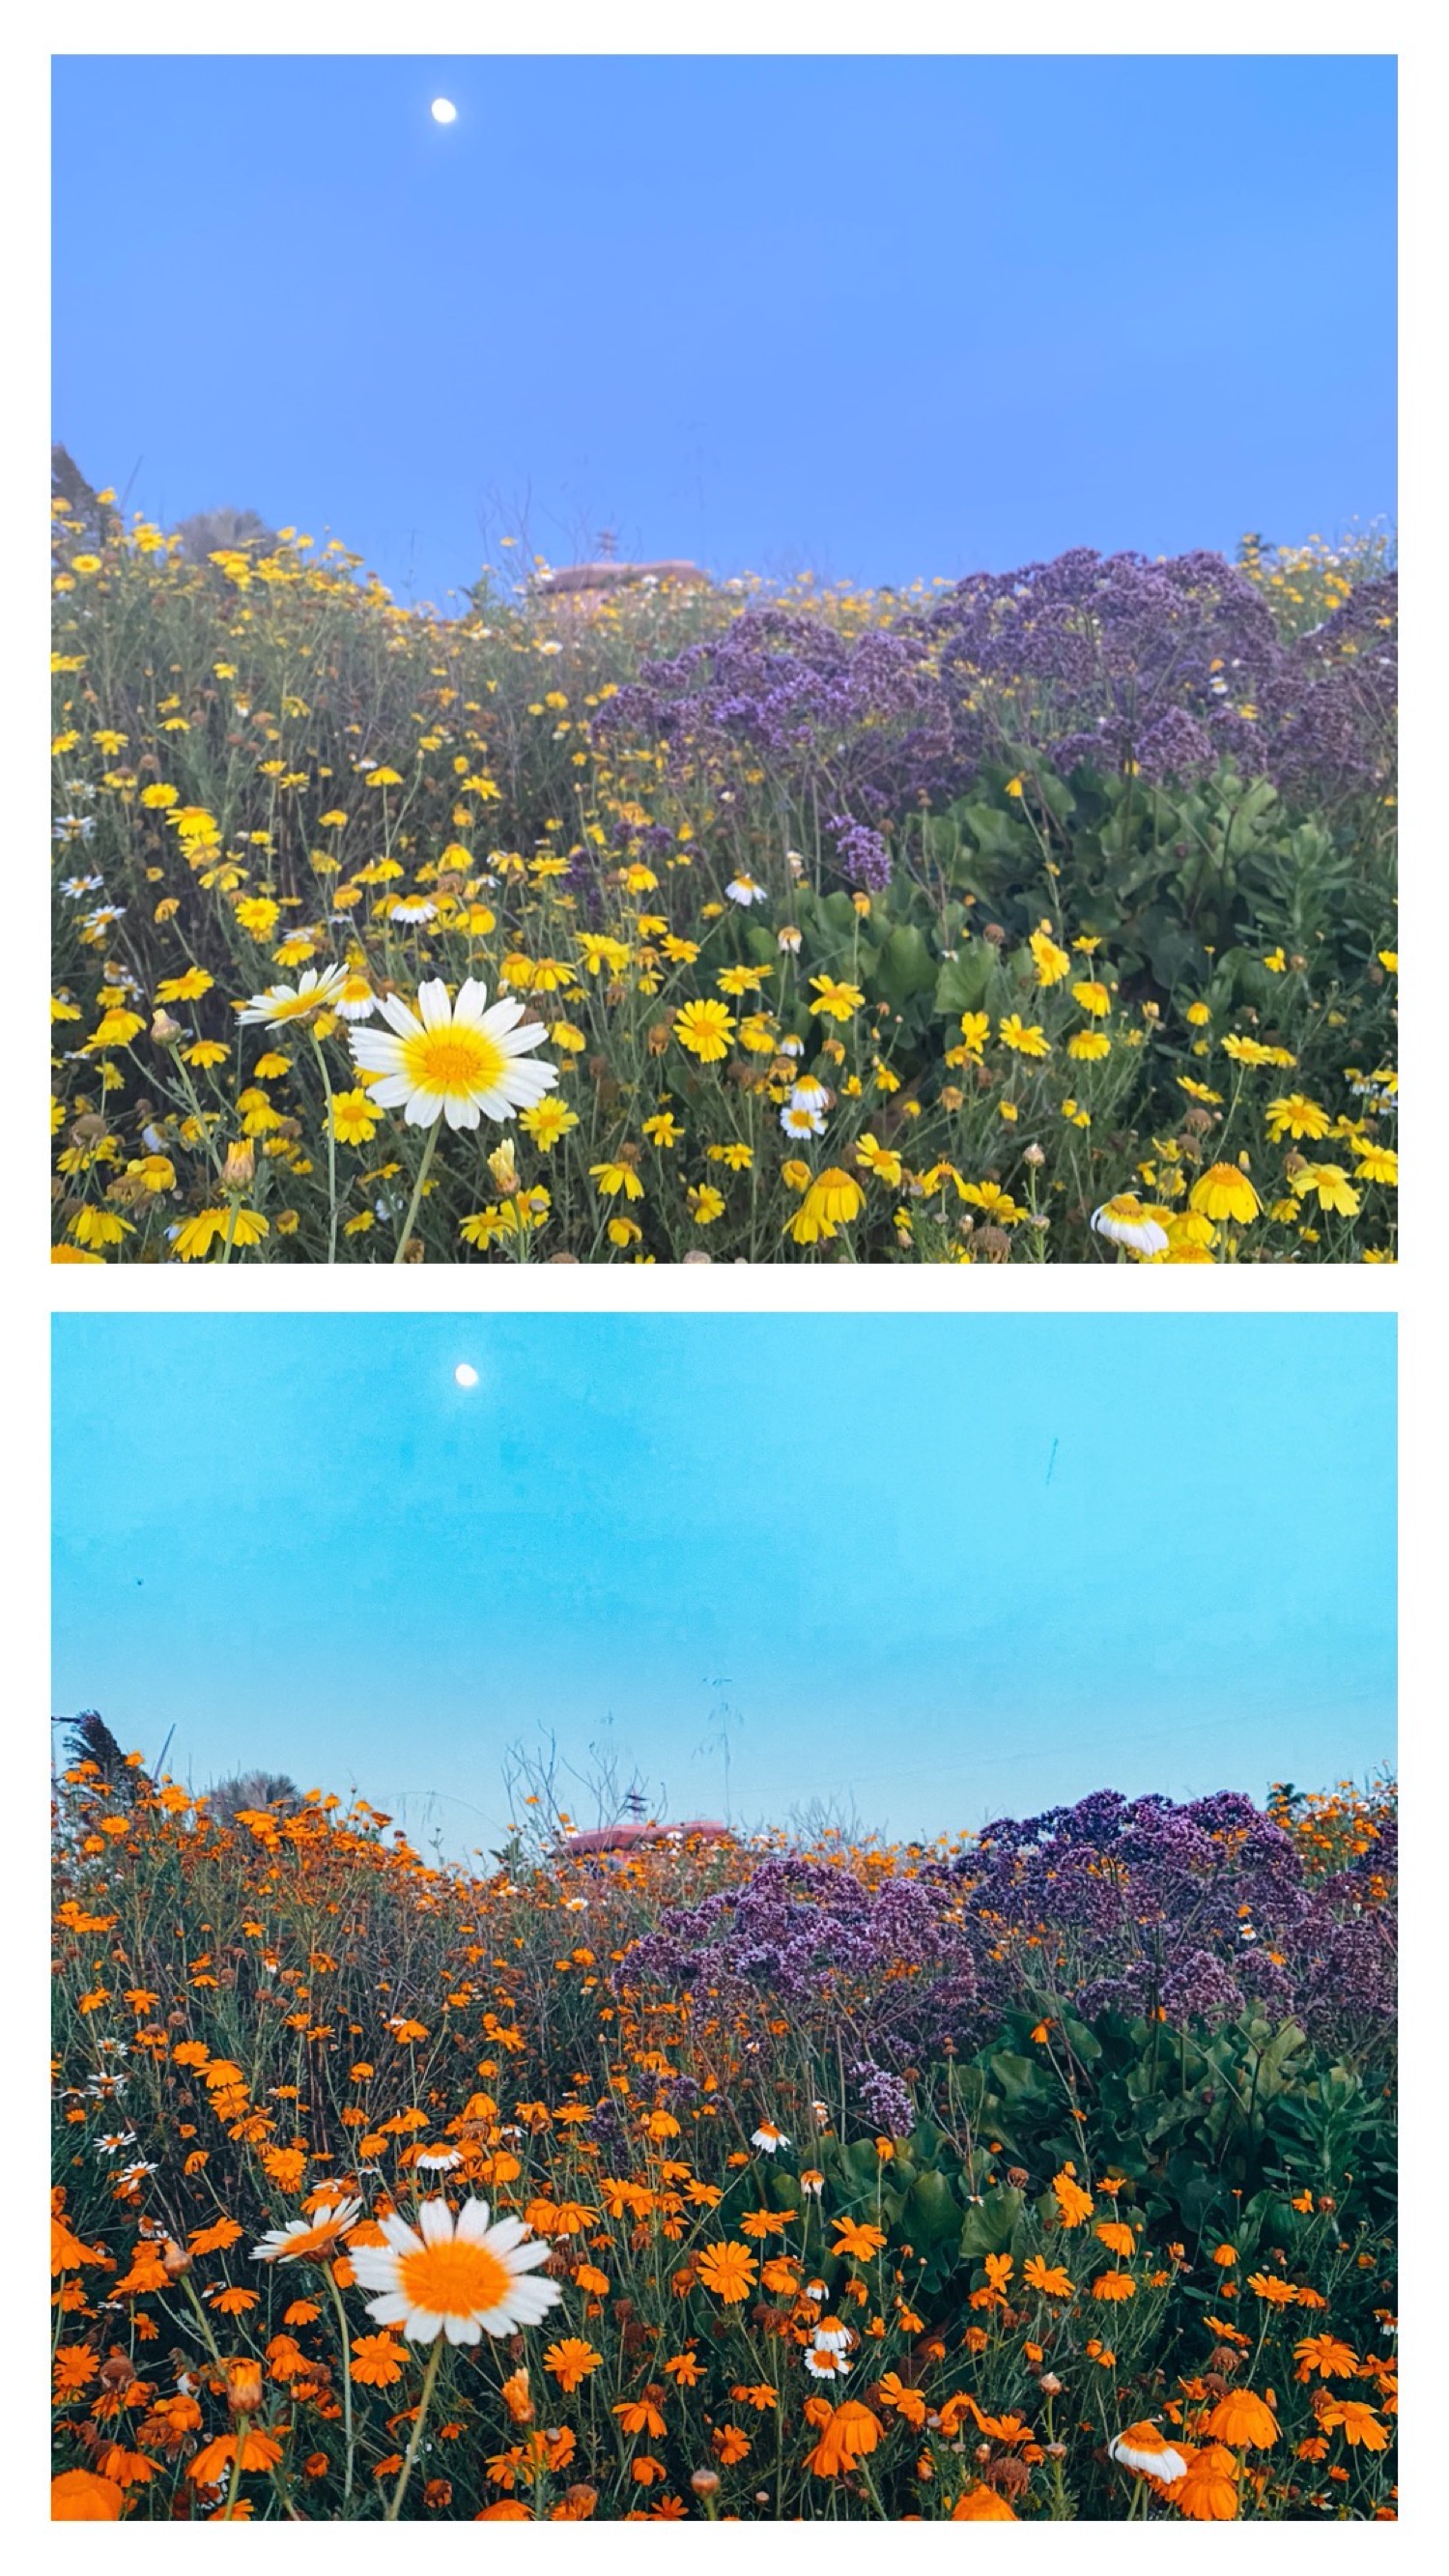
- DON’T USE INSTAGRAMS POST FILTERS. Like the ones they offer in app when you’re making a post. IG story filters are TOTALLY DIFFERENT. THEY’RE AMAZING. I wish they were created sooner, haha. If you scroll to the bottom of this post you will see the two interior images I took screenshots of… IG filters literally make everything look… Better. Without any effort. If you see an IG filter on someones story that you really like, you’ll see the filter name at the top left of the screen. Just tap it, and you can either try it or save it. My favorites are “boho filters by janmahaven” – “golden glow by summer friday’s” – “coffee bean preset by apasynkovaa” – and “retrocam by yulya.kors” — you can search for these within IG.
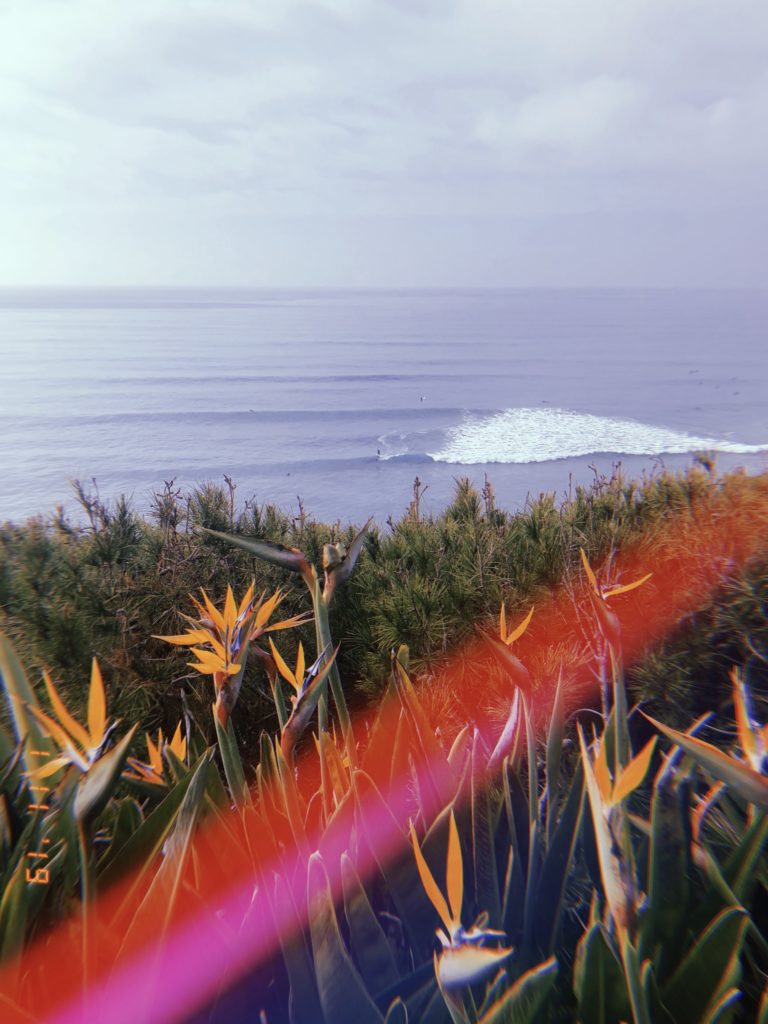
- Download some photo editing apps onto your phone. My favorites are Lightroom Mobile, VSCO, Snapseed, Color Story, and HUJI. Lightroom is my number one go to because it offers the most, and because you can use presets on it, which is what I would use on my desktops version of Lightroom. Presets are a whole different story, but, you can buy them online. The Preset Bundle is my favorite, but it only launches every few months. VSCO offers tons of presets in app and is really popular as well as it’s been around for a long time. Snapseed is pretty user friendly and also has some in app “filters” that are pretty cool. Color Story is similar. Now, HUJI is pretty cool, and offers the ability to take photos in app, and will then apply the filter, or, you can upload photos from your camera roll into HUJI and edit them. HUJI only has one filter, it’s pretty retro and makes photos look like they’re super old school, as if they were taken with a disposable or something. It also offers the option to add a light streak, which is just.. Artsy. Haha. I’ll leave some below. HUJI is the shit. Makes any basic pic look rad with minimal effort.
- Straighten any crooked horizon lines… Please. 🙂
- Have fun! Find your “style” or the aesthetic that you like. I stick to a few edits for photos of nature that I like, to achieve the look I want. I like bright, vivid colors with high contrast.
- Skin tones are always most important, and what you want to pay the most attention to when editing images.
So. There you have it. 15 tips on taking better photos straight from your phone. I promise that if you practice, you will improve quickly and get the hang of it. I love documenting life, because it flies by and I want to have memories of my life, for the rest of my life.
Whether you have children, furry or real.. if you’re into landscape and nature photography… you love taking pics of the interior of your home… or maybe you just wanna take cute photos with your significant other.. I certainly hope this helped you and got you excited to give photography a try!
The top 3 photos were taken using the HUJI app. The bottom 2 images were taken on IG stories. And all the before/afters were taken on my phone and edited on Lightroom Mobile.


Well, that’s all! I’d love to hear if you found this helpful, and I can’t wait to see the amazing photos you take. Feel free to tag me on the gram any time! Now get out there and create some cool photos!

